Showing posts with label Cricut Cartridge Design. Show all posts

Monday, May 7, 2012

Fantabulous Cricut Guest Spot


Happy Monday! I hope you all had a great weekend . This week I am the Fantabulous Monday Guest over at Fantabulous Cricut Challenge Blog. Shocking, I know. Lol. But I still do use my cricut machine for my shapes and card bases, and the occasional image.


The theme for this week is: Mother/Special Lady using her Favorite Colors. I created this card with my Mum in mind. She loves green so I choose this soft green from an old DCWV stack (name unknown as I tore off the front cover way back when I bought it).  My image comes from Kates ABCs. I just love that cart, I think its the cutest thing ever but I hardly use it. To be honest, the thought of finding the right DP for all those layers puts me off. Lol. So I decided to give the cartridge my flair. I used the Cri-Kits to draw out the image and then I colored it with my Prismacolor pencils. I probably take longer coloring then gluing the layers but this is more me :)


So now its your turn to make your "Mami" her special card. A HUGE Thanks to FCCB for having me as their special Monday Guest. Please hop on over to Fantabulous Cricut to check out all the wonderful cricut creations the DT created and to play along. 

Thanks for stopping by! 

I'm playing with:
Oozak - Spring Colors

Wednesday, August 3, 2011

Black Sheep love and a SALE


Happy Wednesday Scrappy Friends! I hope you are out there enjoying your Summer. About 2 weeks ago, I joked with my Getting Cricky DT sisters that I felt like the black sheep of the group - lol - (you can read more on that HERE).   Since then I wanted to create a CAS card that expressed my feelings:  Regardless of how bleak the situation may be or how you may feel or be perceived, You Are Loved! So it doesn't matter if you feel like the black sheep of the group, in your family, amongst your friends remember that us black sheep tend to be special ;) and we are loved. That is my message for you today! :) 


I used the Amazing You set (benefiting Doorways for Women and Families) from KAndrew Designs for my sentiment. I used the Winter Frolic cart for the sheep. I kept it CAS but I added flock to my little black sheep to make him more special :) I also filled the heart with micro beads so it can be a shaker card and I used all scraps (love that part!). Two of my DT Sisters Erika (Shaker Card) and Becky (Scraps) are currently having these mini challenges on their personal blogs so make sure you head over to check them out. Im also playing with Fantabulous Cricut - Lets be Friends.

Thanks for stopping by!

Friday, June 17, 2011

Getting Cricky Blog Hop

Hi All! Welcome to the Getting Cricky blog hop! I'm very excited to be here today to showcase Kristal's stamps. I'm very honored to be part of her team because she began this venture not to gain popularity or to become rich but to try to help others. Not many of us would be willing to do what she is doing and that is what truly sets her apart. When you purchase one of her stamp sets, know that not only are you getting some amazing clear stamps (Made in the USA), but you are also donating to a charity. Your purchase can feed a child tonight or help a fallen soldier receive medical help. So make sure you "borrow" your hubby's credit card and shop, shop, shop. :D


OK so obviously I went on in my intro and forgot to mention that you should be coming over from Kristal's blog. Lol. I hope you were able to make it to the U-Stream and win some of the goodies she was giving away. Plus she had a surprise in store for you, which was to show off her 2 new sets! I decided to use them tonight and give you sneak peeks for those sets.


For my first project, I used the new Splashtastic Summer set. They are such cuuuuuute summer sayings. I just love these! I will definitely be using them for all my summer loving projects. I wanted to use some of the cute sayings that can also be used as positive thoughts. For my cuts, I used Create a Critter, Life is a Beach and Doodlecharms. This set is already available in her shop. Click HERE to go directly there

For my 2nd project I used the Amazing You set. Now I just looooooove this set because of the words and because its a mix and match. Actually, half of her stamp sets are m+m which makes them very versatile, and in my book that's an A+. hehehe. ** This set is already available for pre-purchase. Click HERE to go directly to her shop.

Ok so the way this set works is you start with the "You are" stamp and then use one of the middle sentiments like "beautiful" or "brilliant" and then you end it with "my friend".

As you can see, I didnt quite use it the way I was suppose to. Oh-oh, Im going to get a time out. hehe But I wanted to show you that it can be used in other ways as well. I decided to use "beautiful" first and then used "my friend" but masked off the "my" part. I then drew on the "S" so it can read "Beautiful Friends"

The meaning behind my card was to give to a friend that is feeling down. I wanted it to be a cheery friend card and I also wanted it to look like a Polaroid. Remember those? :) Oh! how I loved taking Polaroid pictures with my friends. Those were definitely cool in their time. For my images, I used stamps from the Teen Scene line from Simply Betty Stamps. *Please note that those stamps were also altered. Lol!!! It seems as if I love to alter my stamps.

I hope you enjoyed my sneak peeks. I hope you come back as I will be having more sneak peeks. Plus, lots will be going on here. :) 
Thanks for hopping by! Your next stop is Kathy from the 3E's Blog.

Saturday, June 4, 2011

Bookmarks Galore


Hi! I'm here to share with you a few of the bookmarks I'm making for my niece's class. My niece wants to give her friends a cute little gift and she figured, "hey, why not have my Tia make them" lol. That means that it is time to use up those scraps. To make them a little fun, not the standard boring rectangle, I'm used different shapes, sizes and characters for these bookmarks. I don't want to play favorites with my projects ;) but I think I like how the Hello Kitty one came out the best. Although, it might have something to do with the fact that she took longer to put together due to all her little parts. Grrrr. lol

Thanks for stopping by/commenting!

Sunday, March 27, 2011

"Hop-py-est Birthday"


Happy Sunday Night!! I hope everybody is ready for Monday morning and get the week started (uggghhhh, lol). So it seems as Birthday season is coming up. I just realized that I missed a friends birthday and one my bff will be celebrating soon. As I sit here, typing this, I remembered the latter. Lol, I don't know where my head has been lately.

So onto my project. I thought I would dust off my Birthday Bast cart. I just loved that cart when it premiered and it was one of those that I neeeeeeeeded to have!!! I needed to have it so badly that Ive only used it a few times (since last year -  i know, that's pretty bad). But I know it happens to all of us so I don't feel so bad :)

For the base of my card, I used the gift that comes with the bunny. This is the reason for the odd shape. I welded the shapes together and omitted the faux ribbon it brings. For my bunny's face, I used half a pks face and then drew in the rest. Hey, I'm working with what I have.

Thanks for stopping by/commenting!

Saturday, March 19, 2011

Hello! and Hop Winner


Happy Saturday!  I hope you had a fun week and are enjoying your mid morning so far. I want to apologize for my bloggy silence. I have been quite busy with some personal stuff which has kept me away (nothing bad, all good). However, I managed to squeeze in some crafty time every night. It only took me a week to create this flower power card. Lol.

Today's card features the technique Charcoal, which is black coloring on kraft paper. The highlights are done with white pencil or pen. I learned this technique from a TGF farmer, sorry the name escapes me at the moment. She's amazing with her cards and coloring. I still need to practice this technique some more but for right now I'm very happy with my outcome.

The image used is Lil Lolita Willow digi from Tickled Pink Stamps (**now only found in rubber form**). The image is colored with Prismacolor Pencils.

I will be playing along with:
Tickled Pink Stamps Challenge - #11 Off the Scrap Desk
Getting Cricky with KAndrew - Simply Sunday: All A Flutter
Scrapaholic by Abby - Challenge #1 (Make up your own Holiday on 3/26. My holiday is "Celebrate Flowers and Butterflies") 

** Now for the I Love Lucy hop winner... CONGRATS!!! #74 Alexandra from Crafty Baubles 
You are the lucky winner of some tasty wine candy :) Please email me your info**

I want to say THANK YOU to all my new scrappy friends. I'm very happy to see that you want to follow my nuttiness. I hope to see you soon again. Actually I hope you do come back because I have some exciting news to share.

Thanks for stopping by!!
As always, I love to read your beautiful comments.

Wednesday, January 5, 2011

Motherly Love


Hi Everyone! This is my first official Valentine's Day Card. I made this card with my sister and niece in mind. I thought that the image was adorable and that it represented them well. As for the 2nd one, that one is going to my mum. I'm her baby kangaroo :) And I know that she will love it. Plus, my mum feeds my addiction. Lol, I cant go to Michael's with her because she wont stop me. Instead she'll be there alongside me filling up the cart. 

All cuts come from the Birthday Bash cart. I bought this one a while back but I had not gotten around to play with it. It's beyond adorable and its currently one of my faves. If you get to play with this cart, you wont be able to choose which cart you would like to create with first.
Thanks for stopping by. As always, I love reading your comments.

Friday, December 24, 2010

Flaunt It Fridays: Turtle


Happy Christmas Eve!! This is it! The last day to get everything wrapped and ready for the Big Morning. Im personally freaking out because Im NOT ready. Ahhhh! lol. Christmas just snuck up on me. Anybody feel that way?

So onto today's card... This week's Flaunt It Fridays cut is the Turtle from Create a Critter. I had fun playing with the cut this week. I feel as if I can relate to the turtle. I sometimes feel that I work slow. Sometimes I'll take over a day to work on a card when it would take someone else an hour or so. And since I thought it would be funny to exaggerate my point, I placed  my tiny turtle in a scenery with big rain drops and semi-high grass to slow him down even more.

As always, if you want to play along and you do not own this cart you can use a similar cut. When you are done, go over to Flaunt It Fridays to link up. In the meantime, tho, hop over to the rest of the DT's blogs and check out their beautiful work.


Picture 2: I used my Prismacolor Pencils, Ink Pads and White Gel Pen to add depth to the cuts.
Inking the edges can work great when you want to cover up your mistakes, especially like I did. I got heavy handed with my Prismacolor pencil on the circle base. I didn't like the look/flow of it so I used my ink pad to distress the edge and blend in the colored pencil.


My concept was for this to be a "Sorry, I'm so Late" card. This is the reason why I placed the turtle in this scenery. The turtle is already slow as it is but add the huge rain drops into the mix, the poor little guy doesn't stand a chance. :)

Thanks for stopping by/commenting. I can't wait to see how you will Flaunt your cut.

Friday, December 10, 2010

Holly Jolly Blog Hop - Day1

** Edited: A Huge THANKS to Kristal from KAndrew Designs for having my piece published. You can click here to go to the link **

Good Evening Jolliers. Welcome to our 2Day Holly Jolly Blog Hop. We are happy to have you hoping along with us. We have over 20+ holiday gift ideas to show you over the next 2 days. There will lots of blog candy along the way. In addition to that, we will be having 3 Grand Prize winners in total. Our 1st grand prize is sponsored by Scrapadabadoo, our 2nd grand prize is sponsored by Sarah Pink Cricut and our 3rd grand prize is a mystery prize sponsored by Stephanie from Always Crafting.  The mystery prize will be revealed at the end of my post.  ** In order to qualify for the grand prizes, you must hop along to all the blogs and leave some bloggy love.

The hop begins with Stephanie and ends with me.

You should be hoping over from Sandra, if not you can continue from here and loop around until you come to me again or start from the beginning.

For my first project, I created a Tea Candle Holiday Card. Now from the front, it looks like an overly done card :) but when you open it, you get a nice little treat.

Picture 1: Front of the Card

Picture 2: I used this critter from Winter Frolic as my main image. I used Winter Frolic for the sentiment: "Warmth and Joy" and Lacy Labels for the Frames.


Picture 3: When you open it, tada. You have a nice little box.

Pictures 4 and 5: Closeups of the little box. The purpose of the box is for the Tea Candles. For this project you need 4 candles (I only had 2 on hand :) but you get the idea)
Picture 6 : Final Product

I am the last stop on this hop. Thank you for hopping with us tonight!! And I hope that you have enjoyed the projects and have walked away with plenty of ideas for you to work on.

Don't forget that we will begin Day 2 of our Holly Jolly Hop tomorrow Dec 11 at 9:00am Eastern Standard Time. We will have a whole new set of projects for you to drool over :)

In case you get lost along the way, here is the lineup of all the Sweet Ladies
 Jess (ME)

REMEMBER TO COME BACK TOMORROW AT 9AM EST

Oh that's right, you are waiting to find out what the mystery prize is. :) Like I said, Stephanie is sponsoring the 3rd grand prize. She is offering a $15 gift certificate for Peachy Keen Stamps. Now remember, in order to qualify you must hop along to every stop and leave some bloggy love.

For my personal blog candy, I will be offering a super cute scrapbook. I don't have a picture at the moment but I will soon. You don't have to be a follower, but I'd love it if you would be.  

Thanks for stopping by and come back tomorrow!!!


Wednesday, November 17, 2010

Companion Challenge: Gift Cocoa

** This is my 2nd post. Please scroll down for Whimsical Wednesday **

This week I will be Cristina's Companion and I'm excited to be it. I really like this week's challenge because I think it can lead to fun, creative ways of giving a co-worker or friend a mini gift/stocking stuffer. I also like it because I think it is an unexpected gift. We are programmed to give cookies, candy, chocolates or even coffee and tea as holiday gifts but never really cocoa (at least for me). As you know, the challenge this week is to find a creative way to gift Cocoa. This became challenging because every time I came up with an idea, I always went for other food items. So after several rough drafts I came up with these 2 simple ways to gift cocoa. They are both mass producible and easy to put together. One, however, is a lot more expensive than the other but that one can always be for a special person.

To find all the details for this challenge and to join in, head on over to Crafting with Cristina.

Picture 1: My 2 simple versions for Gifting Cocoa 

Picture 2: Project 1
The mug can be replaced with any mug that you like. Also, you can wrap up the whole thing with cellophane and give it like that. I didn't do that here because I didn't want to cover up the gift.

Picture 3: This is what I added to the inside of the mug.
Small packet of cookies.
Small packet of marshmallows (use minis).
Bag of Cocoa (your choice of flavor, brand, etc)

Picture 4: All items packaged up and wrapped by bow and tag

Picture 5: Tag (can be open and written inside)
Card Feature - Smiley Faces Cartridge
Size: 3 inches
Gingerbread Man - Smiley Faces Cart
Size: 2.5 inches
Frame - Once Upon A Princess
Size: 2.75 inches 

Picture 6: Project 2
Tag Envelope - Tags, Bags, Boxes & More
Size: 6.5 inches

Picture 7: Back of the Tag/Envelope

Picture 8: Sentiment with layers - Winter Woodland
Size: 3 inches

Picture 9: Surprise Project (3)
This is another super simple project. You use a bag that has a shape of a carrot (can use bags that look like they are for pipping), fill it up to your pleasure. Seal it and tie a bow around it. Then add a cute tag, if you wish. Easy-Peezy

My goal for this project was to give you some simple options.
With Project 1, you can add or take away what ever you like. The cookies, marshmallows can be change - you can add chocolate chips or bits of candy cane. The options are limitless.

With Project 2, it is simple and straight forward. You can change the sentiment and add a different one or use an image. You can make it for Christmas or Thanksgiving, or really any occasion. And if you like, you can you use the paper you least like because it will be covered up with an image.

If you have any questions regarding this project or any other, feel free to leave me a comment or send me an email.

Thanks for stopping by/commenting.

Wednesday, November 10, 2010

"Thinking of You" Card

Good Morning Everyone.
I wanted to share this super cute-adorable card :) that was inspired by the UP. Of course I knew I needed balloons but I didn't want it to be so literal so when I saw the bear balloons and the bear, I knew instantly that this is what I wanted. It took me some time to assemble it together but Im really happy with the outcome. I also really like it because I think that this card can work on many levels. I think that it can be a card for little girls, tweens, teens, etc as well for women in their 20s, 30s and so forth. And I'm not one to really gush but I'm loving how this project came out

I hope that my card inspires you to find some inspiration.
Picture 1: A2 Size
Create A Critter Cart

Picture 2: I always like to add a little something extra to the inside


Thanks for stopping by/commenting!

Wednesday, August 25, 2010

Mini School Kits: Part1

Hi Everyone,
Like I said yesterday, I've been working on some mini Back-to-School Kits for my nieces (and a friend). I started working on this project over a week ago. My goal was to finish in a couple of days but that wasn't the case. This part of the project was prob the most time consuming. I somehow thought that I could alter these notebooks in less than 30 minutes like other crafters do. Lol!

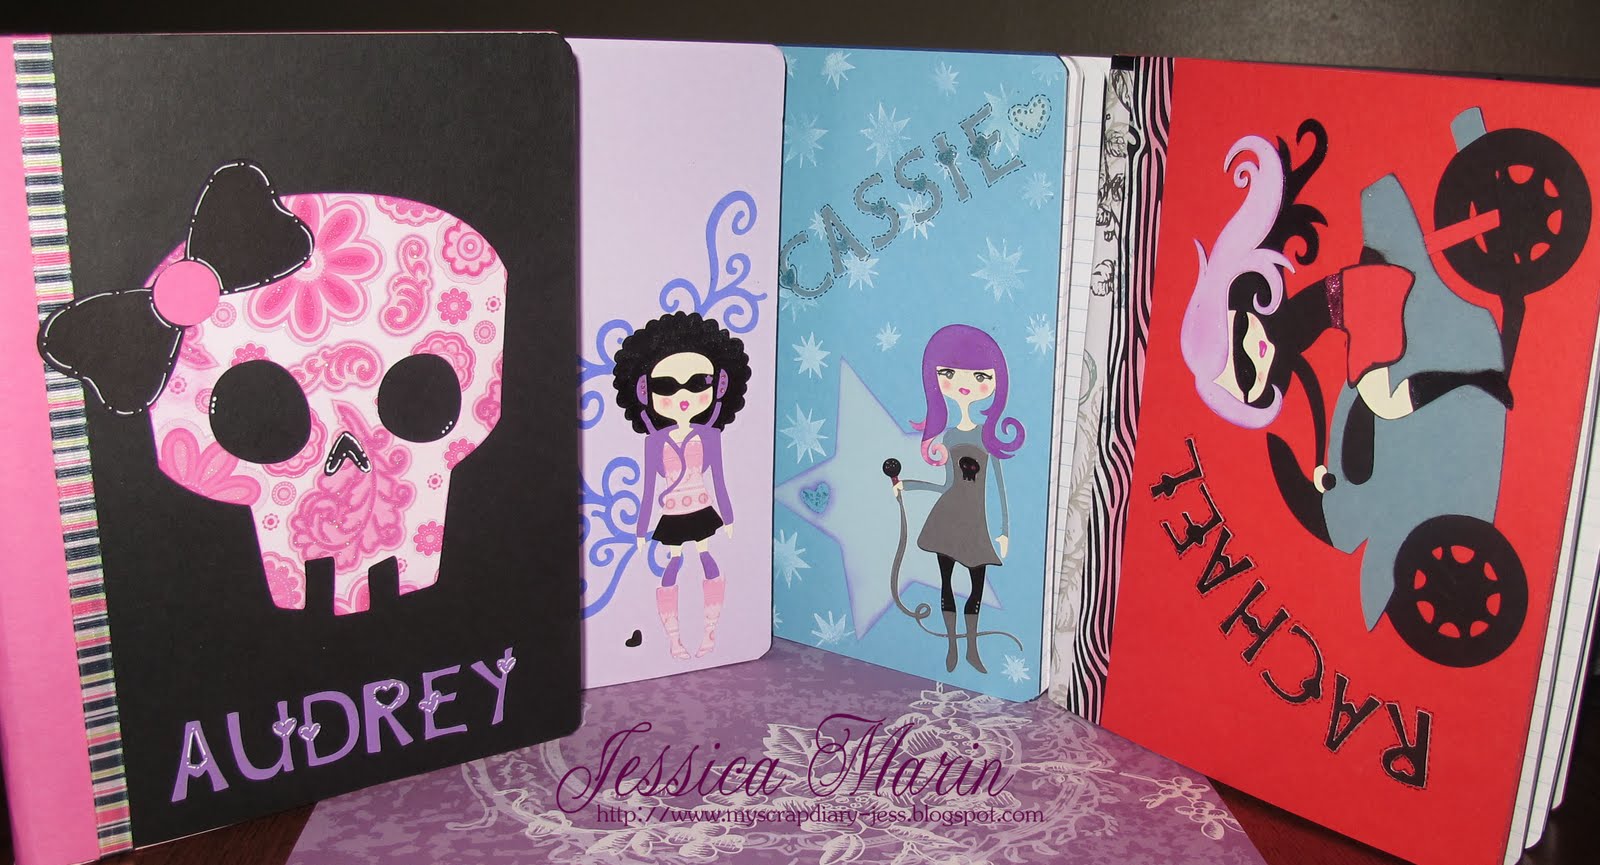
So onto the project. I was inspired by several sites to alter a composition book. I know I couldn' pop dot any images or get extremely fancy but I did want to add my flair to them. I used the Rock Princess cart for all 4 comp books. I used their favorite colors and images that related to them...

Picture 1: Front covers

Picture 2: Book #1 is for my niece that is a senior in HS. She's hoping to learn how to drive this year so I thought this super cool chick was appropriate. I'm not completely done with this one. I want to ink the bike and add some white to the tires.

Picture 3: Inside of the comp book. Since I have never been a fan of the composition book I decided to cover up the inside of it as well.  All 4 of them are covered in the same manner but with different colors. They all have a pirate cupcake and they are all stamped with "You Are Fabulous", a butterfly and a heart sporadically throughout the pages.

  
Picture 4: Book #2 is for my 8yr old niece that loves purple and music, like myself. I just need to add her name and then I'm done.

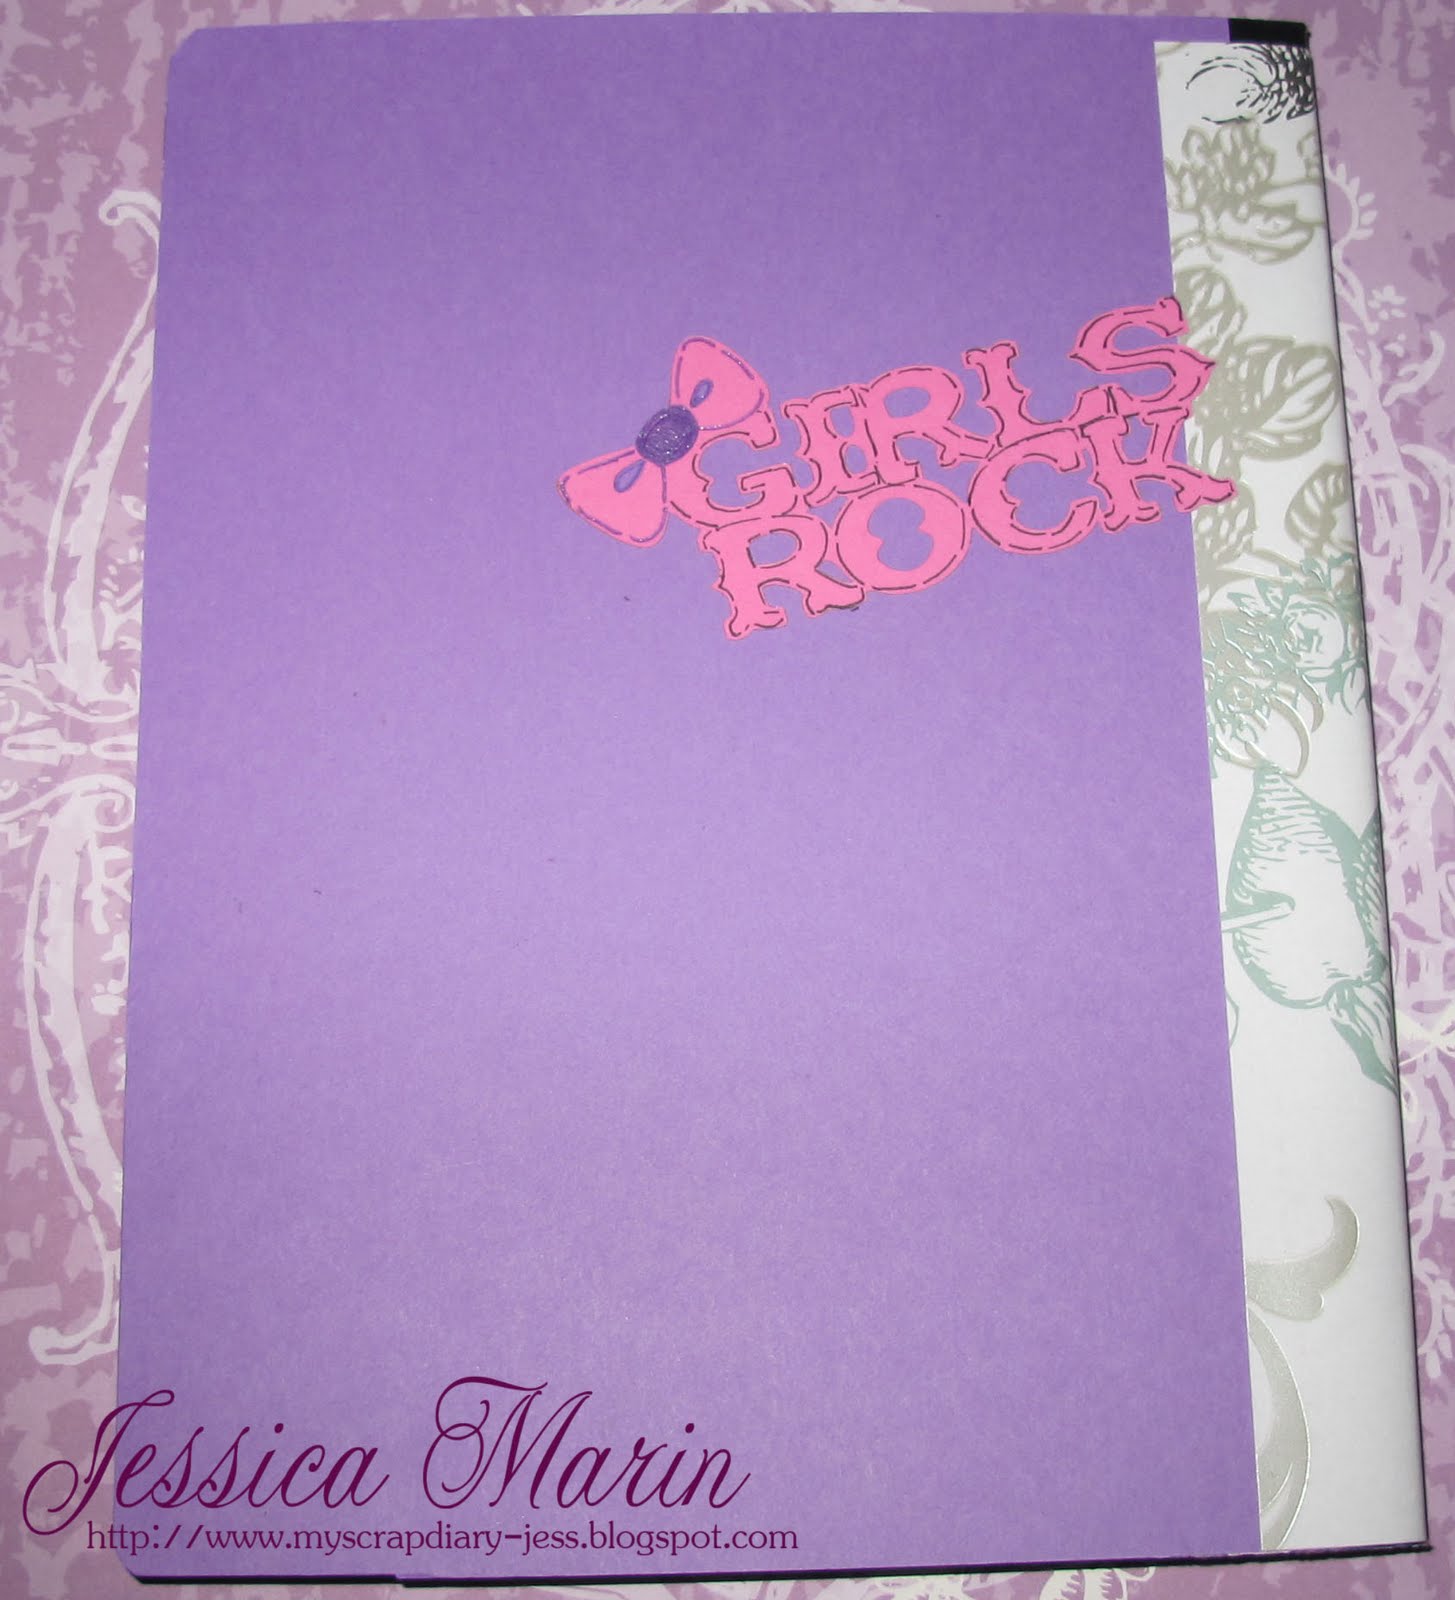
Picture 5: This is the back of the comp book. Like I said, they all look the same except for the colors and placement of the "Girls Rock" image.

Picture 6: Book #3 is for the daughter of one of closest friend. Her DD wanted the Rock Princess cart but it wasn't possible. So I thought I would do a kit for her as well. Audrey loves skulls. She will be turning 12 at the end of this year so she is already at that stage that she wants to dress with dark colors, skinny jeans and skulls. 

Picture 7: Book #4 is for my 10 year old niece that loves to sing and perform. She's slowly being corrupted by Provocraft. Lol. Every time she visits, she wants to use the cricut to make a card or make cuts to take with her.

Picture 8: So I managed to turn this into everything you saw.

Hopefully you are still with me. I do apologize that the post was long. I edited as much as I could. And hopefully I inspired you to alter your own comp book. If I did, please come back and let me know.

I am also entering these comp books in two challenges.
  1. Charisma Cardz Challenge - #33 "Die Cut" Theme, interpreted as I please.
  2. Cricut Cardz Challenge - #39 "Back To School" Theme. I'm not certain if only cards are allowed for the challenge/site. I sure hope not because I love that I found another site that wants us to play with our cricut.
Thanks for stopping by. As always I love to read your comments and feedback.

Thursday, August 12, 2010

Mini Album: Animal Shaped


Picture 1: Front of the mini album

Hi Everyone!!
A quickie post (maybe, lol). I made this mini for one of my closest girlfriends. She has the most adorable dog and she loves him to death. He is def her fur baby and he is def my fur nephew :)  I wanted to do this for her so she can show off Frankie's natural adorableness.

I'm also entering this in 'Scrapping Saturday Mini Album' challenge over at Fantabulous Cricut.  The theme/challenge was to create an "Animal- Shaped Mini Album". They just started a new Saturday challenge, in addition to their weekly Monday challenge. They are currently having a "smile" theme challenge in honor of National Smile Week. Hop on over to check out their blog.
Picture 2: An overview of one side of the 5 pages.

Picture 3: Pages 4&5. Also a couple of tags I'm throwing in there.

Picture 4: Pages 6&7

Picture 5: Frankie. Awwwww!!!!!
Thanks for stopping by/commenting.

Tuesday, July 27, 2010

First Mini Album: Once Upon A Princess

Oh my gosh!!! I ran out of time. I thought I had some extra minutes to spare. The time difference can really throw you for a loop. I was trying to make the deadline for Momo's 'Girly Affair' challenge but that didn't happen. Either way, this is a challenge Ive been wanting to try. I was inspired by Joanna from Scrap-Making. She has made the most adorable minis. They seemed easy to make. Uh no, that wasn't the case for me. I stressed out thinking what paper, images, sentiments, etc to use. I try cheating a bit by buying the chipboard already cut out. But I don't think the cheater method was easier. I had to trace every sheet, manually cut it out and try to line it up perfectly .... that alone took me a few hours.

I inked all the edges to help blend the paper & chipboard. I was torn between a princess theme or a doll theme. I went for a girly theme. I really fell in love with the dollhouse on the paper & I wanted it to be a focal point. I used diff pinks, white & a smidgen of purple. After four days, this is what I came up with...
Picture 1: (L-R) The last page of the mini. I'm leaving it bare because I'm really crazy about the paper. Plus, when it gets put away it needs to be without embellies, etc. The front page is just the dollhouse, little dolly & title.

Picture 2: Page 2&3. This has space for 3 pictures (although the cupcake can be used as journaling tag as well)

Picture 3: Page 4&5. Page 5 has a several journaling tags that can be used for writing and/or some mini pics.

Picture 4: Page 6&7. The cut from page 6 I took apart. It cuts out with the towers connected to the saying but I didn't want the saying covered up with a pic. So I made a little card & glued the "Once..." on top. On the inside I lined it with the paper from pg 9. It gives you space for a pic & writing.

Picture 5: Page 8 and 9. These pages are for pictures and journal.
I'm happy with my mini. Its my first attempt & I'm sure with more practice I can get better at it. I know I have some bare areas that I need to add embellies to them but I don't want to do it now. I want to put it away for a day or two & then go back to it again. For the moment, I'm done looking at it. 4 days was enough. Lol! Plus, it will give me time to reboot & see it again with a diff eyes. It will be easier to add a few embellishes & not overkill it.
I already have another mini in mind. I really want to make one using my Summer in Paris cart but I'm going to wait for my Design Studio for that. I won it on eBay and its already en route. Yay!
Thanks for stopping by/commenting.